
Making your own laptop case is easier than you think. This method can be tailor-made not only for a laptop, but for an iPad, iPhone, iPod…etc.

This is an old quilted blanket. I’ve had it for about 20 years! It’s really stood the test of time! I love the weight of this fabric and the feel of it. This blanket’s backing had started wearing and I used it folded in half for years (I could have sewed a good sheet or nice fabric to it…No, not really lazy, but you know…life takes over and some projects and things are more important.), until a dog I rescued got a hold of it…big un-repairable tears! It’s been such a good blanket, I hated to let it go and thought of all the many things I could make out of the still usable parts. And so the story goes…a project was born! (Come back and see a few more things I’ve made from one blanket. Stay with me!)

There are many styles to try…Do I want the laptop to slide from the top or the side? What type of closure do I want…zipper, button, leather strap? Do I want a closure at all??? I cut many types of patterns using “wholefoods” paper bags. I’m serious when I say, “No big secrets here”…Making a case/cover is truly easy. If you can sew a fairly straight line, you can sew this! All you do is measure what you want to make. For this, I’m making a laptop sleeve/cover for my MacBook. So basically I figured an “envelope” style was the way to go. (In pic above, you see a bubble wrapped envelope? My laptop actually fit in that and I was going to “wrap” the fabric around that for protection, but I decided the blanket alone was really good protection on its own.

No need to make box corners for more space. Picture an envelope. Really, that’s all there is to this! I gave myself a 1/2″ seam allowance. You can also stitch along the edge and let the seam show without turning the fabric inside out. “Rough” edge look!

You can go a million ways with the closure. I went with a simple flap that I could just flop over or tuck in.

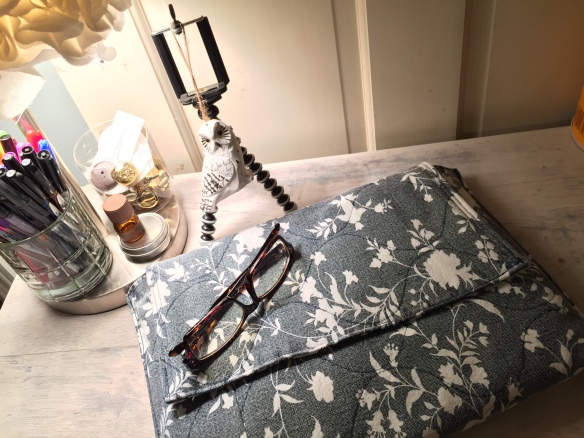
Here it is with the flap, flopped over.

And here it is, flap tucked in.
Tips: If your fabric isn’t padded enough, try doubling the fabric, or adding batting in between the fabric.
Don’t limit yourself to just fabric you can buy at the fabric store. Try vintage tea-towels, a cool towel you got from somewhere, sheets that have torn, an old sweater, jacket, hoodie, jeans…the many “fabrics” you can use is really limitless…oh i’ve also done this with old leather (Up-cycled from leather furniture! You’d be surprised how many people toss out leather sofas. You can up-cycle the leather and not only make laptop case, but, clutches, purses, wallets an ottoman! Let your imagination go wild!)
If using leather, pleather, vinyl, felt…(basically, material that doesn’t fray) Try “whip stitching” along the seams for a unique and fun look.
As I’ve mentioned above, have fun with the types of closures…zipper, leather strap, a belt, buttons (and the buttons don’t have to be round!) Have fun showing off your creativity!
I’ve had this cover for over a year now and I still love it just the way it is. I love the flap concept.
I hope this has inspired you to see things a little differently. Something old can be made into new again!
To all you old and new followers, my wish today, for you…
See this life a little differently in the way that with each unpredictable moment, you dwell not on the chaotic parts, but the precious moments that allow your breath to be taken away.
Hugs and Peace, Koko
